
How to do a dutch braid at home-A simple guide to braiding
written by Christina
Published on May 17, 2021
The Dutch braid is one of the most common hairstyles for women. It is not only fashionable and chic, but it also helps in protecting the hair from the damages from the sun. It also protects your hair from breakage and getting tangles. This hairstyle is not only for cute little girls and teens. It can also be worn by older and more mature women. The versatility of this hairstyle makes this wearable for all occasions. Whether a family day at school or a night out with your partner, with proper styling, this hairstyle can make you look your best. You can even wear this twinning with your daughter! This hairstyle might be a little intimidating but with some patience and practice, you can get your perfect dutch braids. Here is a step-by-step dutch braids tutorial to help you with your styling and some tips on how to take care of your braids.
Dutch braids are also called the reverse French braid. When doing a Dutch braid, the hair strands are crossed underneath to create volume and a 3D effect. Whilst on a French braid, the strands are crossed over creating a flat look. You can do a single dutch braid or for those with thicker hair, you can also do a double dutch braid.
Things you need For Dutch Braid:
When styling your hair to a Dutch braid, you will only need the basic hair styling tools like comb, mousse or hair spray and hair ties.
 |
Glide Thru Detangling Brush for Adults and KidsIt is a specially-designed detangler that glides through, untangling stubborn knots as you comb your hair. Bristles are cut to varying lengths so it pulls tangled strands sideways, gently separating them. |
Use a wide-tooth comb or a detangling brush to remove the knots and tangle of your hair. Avoid using a fine-tooth comb when detangling your hair to avoid hair breakage.
 |
SheaMoisture Curl Mousse for Frizz Control Coconut and Hibiscus with Shea ButterThis hair mousse enhances natural curl memory and wave pattern, and leaves no residue, creating shiny curls with high impact volume and a soft finish. |
You can apply hair mousse if you have thick or coarse hair. It will help you to have frizz-free hair and set for a longer period.
 |
Small Black Rubber Bands for Hair TiesHoyols rubber bands elastic hair ties are an everyday essential. It is stretchy and generous to hold up all of your hair in hair twists, ponytails, dreadlocks, messy buns, or braids. |
Choose a soft and stretchy elastic to tie your dutch braids or dutch braid pigtails at the ends.
Time:
It will take some patience and practice to master the art of dutch braiding our hair. At first, it might take you time to complete your braids and you might not feel satisfactorily with the end result. But once you get the hang of it, you can easily dutch braid your hair in minutes!
Here is how to do a dutch braid:
- Before styling your hair, make sure that they are clean. You can wash your hair with a mild shampoo and conditioner. Do not forget to condition your hair to make detangling easier. You can also opt for dry shampoo.
- Fully dry your hair before detangling. Wet hair is more fragile and easily gets broken so make sure to fully dry your hair.
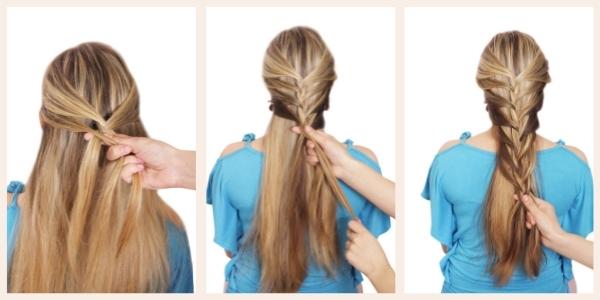
- Take a small amount of hair from the top of your head. Divide the strands into 3 equal sections.
- Start braiding your hair as you would on a French braid, but you need to cross the hair from underneath instead of over. Cross the right strand under the middle strand and then the left strand under the middle strand.
- Repeat the process on the remaining length of your hair taking smaller portions from the sides. Remember not to thug your hair too hard to keep from damaging the hair follicles.
- Once all the strands are braided, tie it with an elastic.
- You can use a hair spray to make sure that the strands will stay in place.
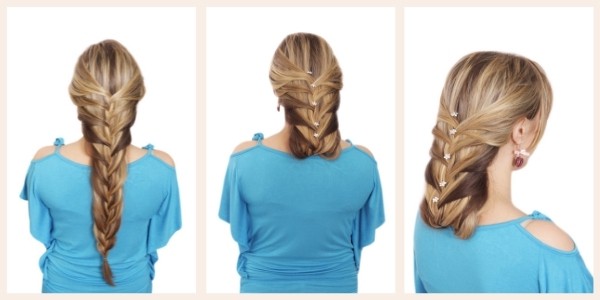
If you plan to do double dutch braids or dutch braids with pigtails, you can follow the same procedure. Part your hair in the middle and start braiding from the top of the other and follow the same steps.
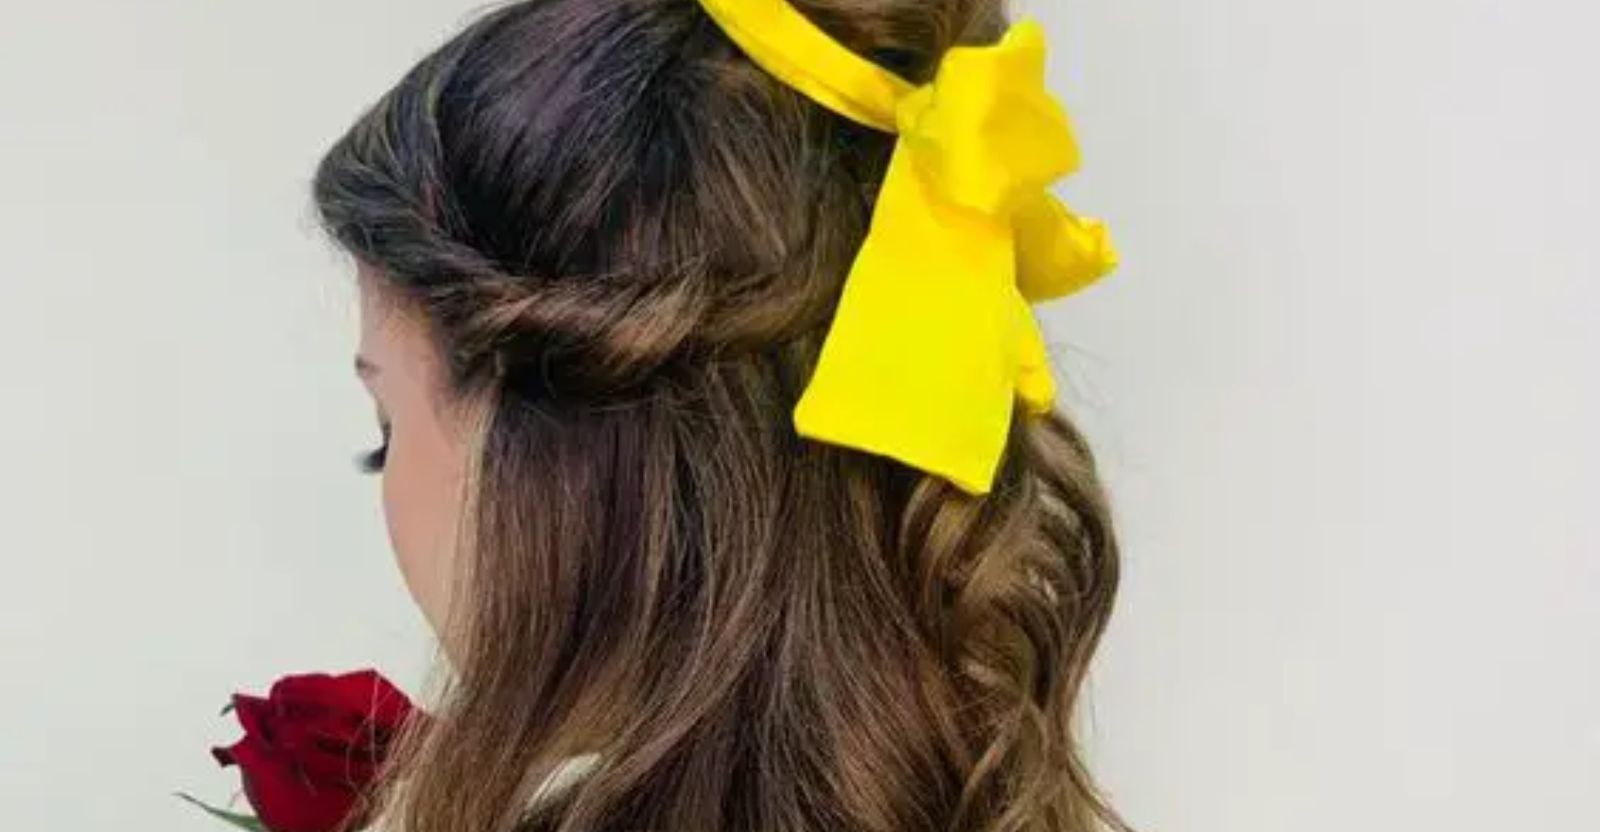
A Dutch braid is not only a pretty and chic hairstyle. It also helps in protecting the hair from sun damage, frizz and breakage. With a little practice, you can master the art of this versatile hairstyle. This hairstyle is perfect for all ages, from young girls to older women. But remember to keep your hair healthy and strong to get the most of any hairstyle that you will do. A good hairstyle always starts with well-maintained healthy hair and scalp. There are many other ways to style your hair using braids.
Read on “Braided Hairstyle” to get different ideas on how to style your hair.


© All Rights Reserved. Curl Hair Style 2024